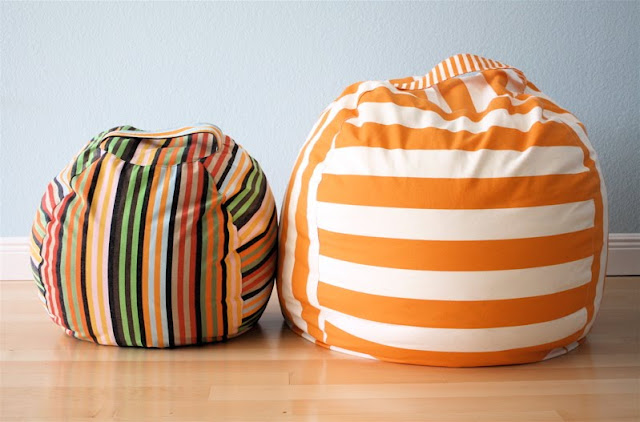
 Meet, The Rollie Pollie:
 It’s a chair, it’s a toy, it’s your favorite pillow.
Made of durable cotton twill or soft vinyl, each bag is actually a slip cover (with another Rollie Pollie inside) then filled with mounds and mounds of soft cluster stuffing. So if it gets dirty, just zip it off and throw it in the wash. And with a handle on top, it’s easy to toss around. Ready for a pillow fight? We’ll let dad referee.
This is a MINI-Tutorial for the Rollie Pollie, showing the basics of how to make one.

This is a MINI-Tutorial for the Rollie Pollie, showing the basics of how to make one.
The Full, Detailed pattern can be found at the MADE SHOP.
The detailed pattern includes: Tons of info about Fabric selection, sewing with zippers, where to buy the right filling for your Rollie Pollie, How-to make an Insert Rollie Pollie and a slip-cover to go over it (easy to wash), and TWO different sizes of Pattern Pieces, which can be printed right on your home printer!
 In this mini-tutorial, we’ll show you how to make the Insert Rollie Pollie.
Okay, let’s get started!
 The Rollie Pollie is made of two pattern pieces (shown in the drawing below). You will need FOUR of the SIDE pieces, and TWO of the Top and Bottom circles. If you’d like to add a handle, cut a rectangle about 1-inch longer than the circumference of your circle piece and about 3 inches wide.
If you want to make a slip-covered Rollie Pollie (by adding a zipper), you will need to make ONE of the SIDE pieces, 1-inch wider in the middle to accommodate the extra zipper seam.
 Create your pattern pieces on a large piece of paper or on a piece of junk fabric. Then with a fabric Marker or Sharpie, trace your pattern pieces on to your fabric. Depending on your pattern size and the width of your fabric, you will need anywhere from 2-4 yards of fabric. For the insert Rollie Pollie, it’s best to use white fabric (so it doesn’t show through the outside slip cover). Twill and heavier cottons work best:
 Once your pieces are cut out, place two of the SIDE pieces back to back, pin all the way down ONE side:
 and sew down that side:
 This next step is not necessary, but it will make your Rollie Pollie stronger. Serge off your seams. If you don’t have a serger, do a zigzag or leave the edges raw:
 Repeat the above steps, attaching all your SIDE pieces to each other. When you get to the last SIDE, YOU NEED TO LEAVE AN OPENING IN THE SIDE so that you can get the stuffing inside. I like to mark my start and stop points with pins, so I don’t forget to leave an opening:
 Then with all of your sides sewn together, place your Circle pieces on the top and bottom of your Rollie Pollie. Pin them down, sew all the way around, and you’re almost done!
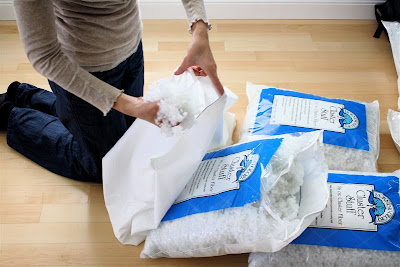
 Turn the Rollie Pollie inside out and fill it with stuffing. I chose CLUSTER STUFF, found at Walmart. (The Rollie Pollie Pattern has more detailed info about all stuffing options).
Fill it as full as you like. You want it to have a little give. But the stuffing will also smush over time, so get a lot in there.
 Pin the opening shut:
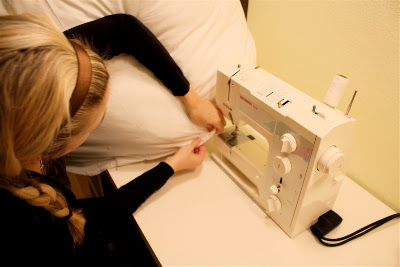
 And though this is bulky to do, sew the opening shut with your machine. It doesn’t need to look pretty because it will be inside the slip cover. Just make sure it’s sewn SHUT!
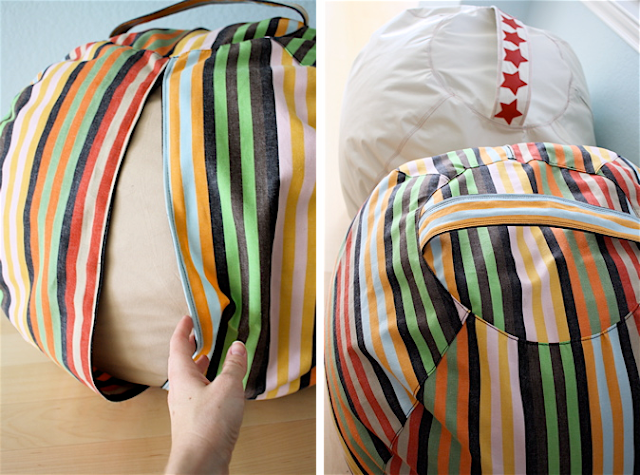
 Stick the Insert into your slip cover and……
 You’re done!
 Fore more detailed info and helpful tips, please see The Rollie Pollie Pattern at MADE.

 Pin the opening shut:
 And though this is bulky to do, sew the opening shut with your machine. It doesn’t need to look pretty because it will be inside the slip cover. Just make sure it’s sewn SHUT!
 Stick the Insert into your slip cover and……
 You’re done!
 Fore more detailed info and helpful tips, please see The Rollie Pollie Pattern at MADE.
Comments
Post a Comment